Pages

Tuesday, November 30, 2010

Paneer Butter Masala


It was one of those weekdays when I returned home with kids very well exhausted. I was entering our apartment gate balancing two bags dangling from both my arms, two high spirtited kids, both my palms clutching each of them to not let them run away. A familiar voice 'Soppui' sounded like music to my ears. It was our area's 'Mobile greens seller' calling out while pushing his cart laden with greens of all kinds. I'm crazy about greens and I instantly had the urge to buy and ended up with 2 big bunches of fenugreek / methi leaves. My two & a quarter year olds lent me their tinty little hands in picking the leaves. Now I'm not a kind of mother who'll spoil my kids by spoon feeding them. C'mon I have two of them and helping one's mother is one of the good habits kids must inculcate from childhood. (I'm glad my Amma never thought so! Phew!)

I made Methi Pulao which I could eat on its own. But I knew Abbas would come back from work and freak out at the sight of it. So I had to make some kind of a gravy to accompany it. Dunno what made me choose Paneer (which is another thing he doesn't like). Finally the hungry soul with rats, cats and dogs racing in his tummy came home and enthusiastically opened the the lids! The inquistive sarcastic looks made me wish I had Harry's Invisibility Cloak to hide myself. He held up all the anger and served himself, while both of us were dumbfounded. I tried to act as if I was too immersed in TV unaware of his dislikes. Finally he broke the ice saying "The curry has really turned out delicious or I wouldn't have had my dinner today!" I silently thanked my stars... and ofcourse Sailu for this restaurant style Paneer Butter Masala recipe.

Ingredients:
250 gms paneer Рcubed and saut̩ in a tbsp of ghee till golden brown, remove into a dish and add a cup of hot water to the fried paneer cubes and let them sit in it for 5mts,then drain the water and keep aside
2 big onions (blanch for 10 mts and puree)
1 tbsp ginger-garlic paste
1 tsp red chilli pwd (I used kashmiri chillis)
3 big ripe tomatoes (blanch ,de-skin and puree)
3 tbsps cashewnut paste
½ tsp coriander pwd
pinch of haldi (turmeric pwd)
1/2 tsp kasuri methi (dry fenugreek leaves)
garam masala pwd (make a pwd of 3 cloves,1 green cardamom and 1” cinnamon)
salt to taste
3 tbsps butter
2 tbsps fresh cream

Method:

1. Heat 2 tbsp of butter in a pan, add the onion paste and sauté till brown.
2. Add ginger-garlic paste. Saute for 3 minutes.
3. Add chilli pwd and combine,followed by the cashew paste and combine.
4. Add tomato puree, crushed kasuri methi,coriander pwd,haldi,garam masala and salt. Stir and let it simmer for 4-5 mts.
5. Add the paneer and simmer for 4-5 minutes. Add a small cup of water and let it cook on medium heat for 10 mts or till you get the desired curry consistency .Remove from fire, stir in remaining butter and fresh cream.
6. Let the curry sit for 10-15 mts before serving.Garnish with coriander leaves. Serve hot with rotis, naan , paranthas or simple steamed white rice.


Best Blogger Tips

Monday, November 29, 2010

Pani Puri


Going back in time:

During summer holidays, we would get hooked to watch all the TV serials that Annamma (granny) and Amma (mom) used to watch. There were two such Kannada serials called 'Maya Mruga' and 'Naaku Tanti' which were class apart from the normal 'Saas Bahu' or daily household 'Khitpit' saga. They were stories of 3-4 protagonists all different natured and from different walks of life. They used to be aired at 4:00 PM. Once the school re-opened, we would miss watching at the comfort of our house couches. While they were being aired, our school would have just dispersed and we would be walking our way back home. Luckily people who used to live on the streets that we walked were also the audiences of these serials. We would hault whenever we could sense that the serial was going on. We would sheepishly eavesdrop not to miss any dialogue. During break, we would again walk to stop at any hint of the second segment beginning. When the last segment would begin, we would have reached home.

Amma would make snacks for us for the 4 o' clock apetite to be quenched. One of those snacks would be Pani Puri. I don't know the exact recipe, but recreated some with instincts and memory. Picked recipes of Pani, Green and Tamarind chutney from Sailu's blog. The filling here is hot curried green peas with hot, sweet and sour chutneys, raw onions, sev. The filled puris are dipped in chilled tangy water and like Sailu says "Explosion of flavours" happens when you put it in your mouth. I specially like the combination of green peas and cold 'Pani'. Simply mind blowing.

My mom occasionally made puris at home but I never tried a hand at it. I conviniently buy my puris from supermarkets. I had all the chutneys left and wanted to make papdi chat. Couldn't find Papdis being sold in any super market here. Went to a chat stall and asked the Bhaiyya there. He gave a whole bunch of Papdis for 10 bucks! The woman in me was delighted! God bless him!

PS: I regret bad quality of photos. As we had savoured this in the late evening, the darkness has cause poor quality pics.

Pani Recipe

Ingredients:
6-7 cups cold water
1/2 cup packed pudina leaves
1 green chilli
Small piece ginger
1 tbsp amchur pwd
1/2 tsp chaat masala pwd
1/4 tsp cumin pwd
Pinch of black salt (optional)
Fresh coriander leaves for garnish
Salt to taste

Mehod:
1. Make a paste of mint leaves, green chilli and ginger and keep aside
2. Take a vessel, add the cold water in it, followed by the green mint paste and combine well.
3. Add cumin pwd, chaat masala pwd, amchur pwd, black salt, salt to taste. Garnish with coriander leaves. 4. Chill in refrigerator till use.

Green peas filling Recipe:


Ingredients:
Dry green peas - 1 cup (soaked overnight and boiled)
Tomatoes - 2 medium sized, finely chopped
Ginger paste - 1 tsp
Bay leaves - 2
Cumin seeds - 1 tsp
Red chillies - 1, beoken into 3-4 pieces
Oil - 1 tbsp
Salt - to taste
Sugar - 1 tsp
Red chilli powder - to taste
Turmeric powder - 1 tsp

Method:
1. Heat oil in a pan. Add cumins seeds, red chillies and bay leaves.
2. Once cumin seeds splutter, add ginger paste and saute till raw smell goes.
3. Add chopped tomtaoes and saute till they are well blended and oil oozes out.
4. Add green peas, turmeric powder, red chilli powder, salt, sugar and a little water and mix well together.
5. Cook till all the gracy has dried out and keep aside.

Khajur Imli ki (Sweet) Chutney Recipe
Ingredients:
3/4 cup grated jaggery (adjust)
10-12 dates
Small orange sized tamarind (de-seeded)
3/4 tsp chilli pwd
1/2 tsp saunf pwd (optional)
1 tsp roasted cumin pwd
Water as required
Salt to taste

Method:
1. Soak tamarind in 2 cups of warm water for 5 mts. Heat a heavy bottomed vessel, add the tamarind along with the water and bring to a boil. Turn off heat and cool.
2. Once cool, grind this tamarind mixture along with dates to a fine paste, adding very little water. Strain through a sieve and pour this tamarind-date paste back into the heavy bottomed vessel.
3. Cook on slow to medium flame for 2-3 mts. Add the grated jaggery and allow it to melt and blend well with the tamarind date mix. Continue to cook till it becomes a thick pouring consistency, approx 15-18 mts.
4. Add chilli pwd, cumin pwd, saunf pwd and salt to taste and combine. Turn off heat. Even if the chutney is thick, its fine.
5. Once cool, refrigerate and use as required.

Green (Hari) Chutney Recipe


Ingredients:
2 cups chopped fresh coriander leaves, packed
1 cup fresh pudina/mint leaves, packed
2-3 green chillis (adjust)
2 tbsps lemon juice
2 tbsps water
1 1/2 tsps sugar
Pinch of salt

Method:
1. Wash pudina and coriander leaves thoroughly and allow the water to drain.
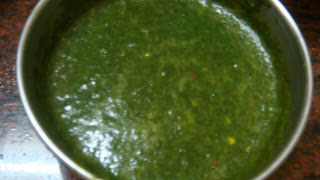
2. Grind the pudina, mint leaves, salt, sugar, lemon juice and green chillis to a fine paste, by adding 2 tbsps water.
3. Remove into a bowl. Refrigerate until use. Goes well for chaats like Pani Puri, hot snacks like Samosa or as a spread for sandwich.

Red Chutney:


(This chutney has raw garlic and could be avoided while assembling coz many detest the flavour of raw garlic. But personally I am a garlic patron)

Ingredients:
Red chillies - 10 -15
Garlic - 5-6 pods
Cumin seeds - 2 tsp
Salt - to taste

Method:
1. Just grind all the ingredients with a little water.

Assembling:
Make a small hole at the top of a puri by lightly pressing. Take care not to break the puri. Place a tsp of hot green peas filling. Add 1 tsp of tamarind chutney, 2 drops of green and red chutneys each. Add a tsp of chopped onions and sev on top. Arrange filled puris on a plate in a circle. Place a small bowl of Pani in between and serve. Puris are be dipped in the bowl of Pani and directly stuffed into mouth without any delay.

Best Blogger Tips

Thursday, November 11, 2010

Dahi Vada


I was a very choosy and fussy eater in my childhood, rather till getting married. I remember my Ajja (Grandpa) would say 'Khanche mulle baisunu assaki tugele bammunu. Tukka poLoche aile tenna, tu khainattille itemache list kornu divka takka' (Meaning, wonder which corner of this world is your partner sitiing. when he comes to see you, I would hand him over a list of all that you don't eat.) I would say 'Ajja, haanv khavche itemache list kelleri sulabha.' (Grandpa, it would be better if you list all that I eat coz it would be a tad smaller list). I had a few favourite dishes of mine which I would determinedly stick to, unwilling to experiment.

We used to frequent an age old famous restaurant in Udupi called 'Diana'. I would always order 'Poori Kurma and Rose Milk' Now when I look back, I say to myself 'Wierdo!'. I would not have raw onions, tomatoes, coriander leaves even! Sighhhh... I would pick the minutest piece of tomatoes and coriander leaves from my curries and my banana leaf would end with a neat heap of all the 'wastage' at its right top. I used to not have curds. Hence only chat I could opt was masala puri with specific instructions to not garnish with raw onions or tomatoes or coriander leaves. Phewww! Wasn't it too much??

I would not eat Tomato Saaru which is one of my comfort foods now. I remember one of my aunts who was a great fan of my Amma's cooking would politely advise me - "Seema, you must try to taste all kinds of food. Your Amma makes the world's best Tomato Saaru. You are truly missing out on lot of good stuff". Now I crave for Amma's food which I don't have access to...

After marriage, my life dimensionally changed. All those food tantrums were put to an end, not at once but gradually. Nobody forced me to but somehow, absence of Amma and the way she would pamper me by cooking only what I ate. I was the one responsible to cook according to my family members' likes and dislikes. Also Bengali food is so magical that I could hardly say no to it inspite of the presence of ingredients I never laid hands on before. My parents and especially my sis, Sindhu would pester me to try out several things but in vain. If they see me now, they would be surpised.

This is one of the dishes I never tasted before marriage but people aound me were crazy about it.

Recipe source - Ria's Collection (Don't go by the length of the recipe, it very easy to make)

Ingredients:


For the vada/croquettes
Whole Urad / Black gram Dal - 1 cup
Water- 1/2 cup
Salt -to taste (about 1 1/2 tsp)
Green chillies- 6-7
Rice flour- 5-6 tsp
Oil- for deep frying

For soaking:
Warm water - 4 cup
Salt - to taste (optional)

For the dahi/Yogurt sauce:
Thick yogurt- 2 c
Water *- 1/2 c
Salt-to taste
Sugar- to taste

For garnishing:
Tamarind chutney- 4 tbsp (optional)
Red chilli powder/ Paprika- 1 tsp
Coriander powder-1 tsp
Cumin powder-1 tsp
Cilantro/Coriander leaves- 4 stalks, chopped fine.

For Tamarind Chutney: (optional)

Tamarind pulp - 2tbsp
Water- 2 cups
Salt- 1 tsp
Jaggery-1/2 cup, powdered & packed
Red chilli powder-1 tsp
Cumin seeds-1 tsp
Fennel seeds-1 tsp

How to prepare Tamarind Chutney:
1. Heat one cup of water in a microwave (or stovetop) and add the tamarind paste to it. Mix well making sure there are no lumps in it.
2. Add the other one cup of water and boil it.
3. Once it starts boiling, reduce the flame to medium and add the jaggery. Mix well and let it melt.
4. Let it boil till it reduces to half quantity.
5. Meanwhile, dry roast cumin seed and fennel seeds and powder them.
6. Once the chutney starts coating the back of a spoon, switch of the stove and add salt, red chilli poweder and powdered spices. Mix well.
7. Adjust the salt if needed.

Method:


For the vada/croquettes:
1. Wash the urad 3-4 times until the water is clear.
2. Soak the whole urad for 4-5 hours or overnight. In the morning, drain the excess water.
3. Grind it to a thick smooth paste along with 1/2 cup of water, salt and green chillies.
4. We need a real thick batter, thicker than cake batter. Basically it should be scoop-able and shape-able.
5. Add the rice flour to achieve that consistency. Rice flour also adds a crunch to the vadas when fried.
6. Heat oil on medium high for 3-4 minutes. Once it is hot, reduce the heat to medium.
7. Scoop out some batter using a spoon and drop it . Deep fry them till golden brown.Each batch will take 4-5 mins.
8. Drain the excess oil on a tissue paper.
9. Soak them in water +salt (add only if you need more salt for the vadas) for 2-3 mins and squeeze out the excess water.
10. Arrange them in a big serving bowl. Keep aside.

For the Yogurt sauce:
1. If your yogurt is thick, add water and whisk till smooth. Add salt & sugar to taste.
2. If your yogurt is loose, do not add excess water. Just add salt & sugar to taste.
3. Pour over the arranged vadas.

Garnishing:
1. Sprinkle red chilli powder, coriander powder and cumin powder over the dahi.
2. Drizzle few tablespoonfull of homemade tamarind chutney over it.
3. Garnish with coriander leaves.

Serve chilled!

Best Blogger Tips

Tuesday, November 9, 2010

Chhole - No Onion, No Garlic


Speaking of Chhole reminds me of the lady with whom I stayed as a Paying Guest. When I first joined the corporate world as a Fresher, I was sent on an 'On The Job training' to an all new place. It was just few months after my marriage and a great oppurtunity not worth missing. Due to the support of my in-laws and the ever-supportive and loving Abbas by my side, I was all set to take a leap into the corporate world. Living away from family was unknown to me till then. It changed my life 360 degrees. Financial independence and no guardian to be answerable to, taking your own decisions, it was an experience of its kind. We were a group of six gals living in the same PG. We would sing, dance, study, wash clothes, go out together. Our take home was in 4 digit figure then. We succumbed while paying aunty the rent which at times was more than half of our poor salary. But we had fun for the entire 4 and a half months. Needless to mention how I missed being with Abbas and family.

We used to get a glass of milk every night after dinner. We would wait with our normal sized glasses and the caretaker would appear with a huge jug of milk and the smallest glass ever made by mandkind. She would pour milk from the jug into that measuring glass (in front of our hungry eyes and sinking hearts) and then pour into our individual glasses. We would drink it blessing aunty! Chicken was served once a week, and you would not be able to spot the chiecken pieces even with a microscope. Chhole was the only thing worth its salt. It was served once a week and I would wait for it. One day I 'maskafied' the caretaker saying the Chhole was very delicious. She proudly said I made it today. I asked for the recipe. She said the normal "Onion+ginger+garlic+tomato+saute" recipe. Only thing that caught my attention in her recipe is that she made a paste of a handful of boiled chick peas and added it to the gravy which gave it an excellent texture. I have been following that ever since...
Back from memory lane...
Puri or Luchi finds its place on our breakfast table on weekend mornings. It is generally accompanied by Chhole or Ghugni or Alur Tarkari. This is a Niramish Chhole meaning there is no onion or garlic used in this dish. Its my own recipe inspired by some Bong Niramish dishes and PG aunty's Chhole. Whenever I'm in no mood to chop onions, I go the Niramish way. If you taste the outcome, you wouldnt mind the absence of garlic or onion.

Ingredients:
Chickpeas - 1 cup
Potatoes - 1 medium sized, cut into small cubes (optional)
Tomatoes - 2 medium sized, finely chopped
Ginger paste - 1 tbsp
Cumin seeds - 1 tsp
Red chillies - 1 large broken into 3-4 pieces
Bay leaves - 1 or 2
Turmeric powder - 1 tsp
Red chilli powder - to taste
Coriander powder - 1 tsp
Cumin powder - 1 tsp
Salt to taste
Suagr - 1 tsp
Oil - 1 tbsp
Baking soda - a pinch

For garnishing:
Coriander leaves - handful, finely chopped
Lemon juice - 2 tsp
Chhole masala / Garam masla / Bong bhaja masala - 1/2 tsp

Method:
1. Soak chickpeas in 3-4 cups of water mixed with baking soda. Let it sit overnight.
2. Pressuer cook the chickpeas and potato cubes for 3 whistles. I generally keep the flame on high for the first two whistles and cook on low flame till the 3rd whistle goes.
3. Drain the water and keep aside. If you have lexcess of water, you may store it and may be use while making dough for Puri or Roti.
4. Take a handful of the boiled chickpeas and make a paste of it.
5.Heat oil in a pan. Add cumin seeds, red chillies and bay leaves.
6. Add ginger paste, you may lightly cover with a lid coz the oild would start spluttering making the surrounding a mess.
7. Add chopped tomatoes and saute till they are nicely smashed and oil starts oozing out from the sides.
8. Add the boiled chickpeas, potatoes, chickpea paste, turmeric powder, red chilli powder, coriander powder and cumin powder, salt, sugar and combine.
9. Add a cup of water and boil till you get the desired consistency. (Please note that the gravy thickens if it is allowed to stand and consumed at a lter time)
10. Remove from heat. Sprinkle chopped coriander leaves, lemon juice and any of the spice powder mentioned in the garnish section and combine.
11. Serve hot with puri or luchi or any Indian bread.


Best Blogger Tips

Monday, November 8, 2010

Chocolate Mousse


This was the October challenge on Sweet Punch and we were spoiled for choices as there was a Tomato Souffle and two varieties of Chocolate Mousse, one with eggs and the other without. The Eggless Chocolate Mousse was on my mind coz the prefix of recipe's name said 'Instant'. It had marsh mallows on the ingredient list which I somehow couldn't get hold of. At the eleventh hour, changed plans to make a Mousse with eggs. I had a bar of Cadbury's with I used. My kiddos simply loved it.


  • Chocolate Mousse (with eggs)
  • Recipe source: Simply Recipes 
  • INGREDIENTS

    • 4 1/2 ounces bittersweet chocolate, finely chopped

    • 2 tablespoons (1 ounce) unsalted butter, diced
    • 2 tablespoons espresso or very strong coffee (I used decaf espresso from a local Starbucks)
    • 1 cup cold heavy cream
    • 3 large eggs, separated
    • 1 tablespoon sugar
    (Optional) Raspberries and extra whipped cream

    METHOD

    1 Whip the cream to soft peaks, then refrigerate.
    2 Combine the chocolate, butter, and espresso in the top of a double boiler over hot, but not simmering, water, stirring frequently until smooth. Remove from the heat and let cool until the chocolate is just slightly warmer than body temperature. To test, dab some chocolate on your bottom lip. It should feel warm. If it is too cool, the mixture will seize when the other ingredients are added.
    3 Once the melted chocolate has cooled slightly, whip the egg whites in a medium bowl until they are foamy and beginning to hold a shape. Sprinkle in the sugar and beat until soft peaks form.
    4 When the chocolate has reached the proper temperature, stir in the yolks. Gently stir in about one-third of the whipped cream. Fold in half the whites just until incorporated, then fold in the remaining whites, and finally the remaining whipped cream.
    5 Spoon or pipe the mousse into a serving bowl or individual dishes. If you wish, layer in fresh raspberries and whipped cream. Refrigerate for at least 8 hours. (The mousse can be refrigerated for up to a day.)
    Serves 5-8, depending on the size of the servings.


Best Blogger Tips
Related Posts Plugin for WordPress, Blogger...