Pages

Friday, December 31, 2010

Indo-Chinese noodles


This dish makes an appearance atleast once in a month on our table. Abbas and I both don't eat rotis or chapathis for lunch or dinner. For rice patrons like us, absence of rice means an incomplete meal. But when we crave for a change once in a while, we go for Noodles. Kids love it too and the quantity of consumption would be more than compared to rice. My Amma would always tell us siblings that you have two different stomachs in there. One for your favourite food which always has space to accomodate and the other for your non-favourites which always claims to be full!

Ingredients:
Hakka Noodles - 1 packet
Veegies - 1 cup, sliced to thin long juliennes(Carrot, Beans, cabbage (par boiled), capsium, spring onions)
Onion - 1 medium, sliced
Tomato sauce - 1 tbsp
Soya sauce - 1 tsp
Green chilli sauce - as per taste
Maggi cube - 1
Salt - to taste
Pepper powder - to taste
Scrambled eggs - 2 (optional)
Oil - tbsp

Method:
1. Cook noodles as per instructions on the packet. After draining water, spread it on wide plates and let them cool completely.
2. Heat oil in a pan. Add onions and saute for 2 mins.
3. Now add all the veggies and saute for another 2-3 mins. Add rest of the ingredients and noodles and toss them well so that all sauces and veggies are uniformly mixed with noodles.

Note:
1. I generally don't add tastemaker while making instant noodles for kids. I use all those stocked up tastemaker sachets while making noodles. You may add Maggi cubes instead.
2. Since soya souce and tastemaker / cubes have salt in it, be careful while adding extra salt.
 
Best Blogger Tips

Thursday, December 30, 2010

Prawn Biriyani


My Amma made two versions of Prawn biriyani - Red and Green. As soon as Annu (dad) would get fresh prawns, we would vote for Green or Red. Irrespective of the colour, both tasted heavenly. I don't remember the recipe for Green version but Red is the easiest with minimal ingredients and simple cooking procedure. This recipe was my Dad's sister's whom we too call Akka. If I remember right, she had sent this recipe to Sanjeev Kapoor's cookery contest and won a reward. Beenakka, thanks for this wonderful recipe!

Ingredients:
Prawns 1 cup - deshelled, deveined and cleaned
Onions - 3 medium  sized, sliced
Salt - to taste
Cumin seeds - 1/2 tsp
Bay leaves - 2
Oil - 2 tbsps

For the masala:
Red chillies - 10-15 (or as per taste)
Cumin seeds - 2 tsp
Garlic - 1 tbsp

For the rice:
Basmati rice - 3 cups
Tejpatta – 2-3 (optional)
Cloves – 3-4 (optional)
Cinnamon – 1”inch piece broken into small pieces (optional)
Cardamom – 3-4 (optional)
Black pepper – 4-5 (optional)
Jeera – 1 tsp (optional)
Red chilli – 1 (optional)
Vinegar - 1/2 tsp
Oil - 1tsp
Salt to taste

Method:

To prepare Rice:
1.Boil water in a vessel along with the whole garam masalas.
2. When the water starts boiling, add the rice, vinegar, salt and 1 tsp of oil.
3. Keep checking the rice until it is almost done but not fully done.
4. Strain the water away.
5. Immediately spread the rice in 2-3 plates. This prevents the rice from being sticky or stops it from cooking further.

To Prepare Prawn Masala:
1. Heat oil in a pan. Add cumin seeds and bay leaves.
2. Saute oinions on low flame till translucent or light golden brown.
3. Add the ground masala and again saute till oil startes oozing from the edges.
4. Add prawns, salt and saute till they are well cooked.

Assemling:
You may either layer the rice and prawn masala as in a Biriyani or lightly mix them taking care not to break the rice grains by mixing vigorously. Tastes best when it is left to stand for 3-4 hours. (We siblings used to fight over the leftovers next day)

Note:
1. Prawn can be replaced by fish. Use fish with least bones. Lightly boil fish pieces so that removing bones would be easier.
2. I have given the method of preparing rice as in Biriyani. You could even you plain rice but make sure you add salt while preparing rice.


Best Blogger Tips

Tuesday, December 28, 2010

Paan Polo alias Neer Dosa alias Coconut Dosa


I like my Dosas 'Size 0' in thickness, crisp and fiery hot right off the tawa. Post marriage, my in-laws wanted to try out Nayi Naveli South Indian Bahu's 'Dhosha' (thats how Bengalis pronounce it and I scream in my mind on hearing the mis-pronunciation. One of the reasons why I always knew my kids' names would begin with any alphabet but S or A, S would become Sh and A would be O, Phew!) The tawa they had was not anywhere near to the traditional flat Dosa tawa. It was the one in which they made Roti which was steep in between. The batter would go and settle in the centre as if in an Appam Kadai. Well then one of my closest friends got a Dosa Tawa shipped for me all the way to Kolkata and it is now one of my prized possessions. It always yields me fool-proof Dosas and earns me showers of appreciations.

Neer Dosa is very easy to prepare. I generally prepare it with Batata Song. You may also serve it with grated coconut + melted Jaggery combo, or simply melt some Jaggery and serve as a dip with the Dosa. Also another best accompaniment would be previous night's left over chicken curry. Yummm!

Ingredients
Raw rice - 1 cup
Grated coconut - 1/2 cup
Salt to taste

Method

1. Soak the raw rice overnight.
2. Grind it with coconut to a smooth batter.3. Add salt to taste and water if required.4. The texture should be a little more thinner than the regular dosa batter.
5. Once the dosa tawa is fuming hot, sprinkle the batter using a ladle all over. Add enough oil. Reduce flame to sim and close with lid. No need to roast on both sides. Open the lid after a minute or two. Increase flame and remove using a spatula (My daughter pronounces Pakula)
Best Blogger Tips

Monday, December 27, 2010

Grilled Chicken


Having full chicken translates to 'celebration' for me. When in Chennai, I worked in Ascendas Tech Park. We were a gang of 5 people who named us 'Foodie group'. I was the only one lady among a bunch of men. We would daily taste different dishes from different outlets. There came a time when we had almost tasted everything on each of their menus. There was this eatery called 'San's Kitchen' famous for South Indian Non-veg specialities. They would serve Full Fried Chicken on Thursdays and we would longingly wait for it. When I saw this full grilled chicken on Jaya's blog, I just couldn't wait to try it at home. The only problem was that I got a big chicken and the top got slightly over roasted. Only thing I would change when I prepare this next is that I would get a baby chicken and follow the recipe.

Ingredients:
1 baby chicken

For marination:
½ cup of yogurt
2 tsp of red pepper powder
2 tsp of red pepper flakes
1 tsp of turmeric powder
2 tsp of cumin powder
2 tsp of coriander powder
3 tsp of Shaan Shekh kabab masala powder
1 tsp of dried thyme or any other herb
2 tbs of cooking oil
Salt as per taste
Mix all the dry ingredients in a bowl with yogurt.Whisk in gently till they blend well.

For the stuffing:
2 slices of whole wheat bread made into crumbs
1 bunch of spring onions chopped finely
1 tsp of red pepper powder
2 fat garlic chopped finely
Salt as per taste

Method:
1. Wash the chicken well in lukewarm water specially inside the cavity.
2. Make the marination: whisk in cumin+coriander+red pepper +turmeric+shekh Kabab masala+dried thyme+red pepper flakes +salt as per taste in yogurt very well.
3. Generously rub it all over the chicken and also to inside the cavity of chicken. Keep refrigerated overnight. (Please do not skip this stage for making roasted stuffed chicken.)
4.Chop spring onions and garlic and then add in red pepper powder,salt and rest of the marination of chicken.
5. Stuff this mixture inside chicken cavity. You may tie or sew the chicken with thread so that the stuffing don’t come out.
6. Preheat oven at 190 deg Celcius for 2mints.
7. Line a roasting tray with foil and then place the chicken stuffed over it. Place in the second shelf of the oven.Bake it for 45 mints without skin and if the chicken has skin, then add in more 4-5 mints. Half way thro ,take out chicken and bast/brush it with some oil.

Note-
You may use any stuffing also, I have used many times celery+mushroom or mushroom+bell pepper as stuffing for the chicken.


Best Blogger Tips

Tuesday, December 7, 2010

Apple Crumble


Joining Sweet Punch was one of the best decisions of my life! Coz I have been on a baking spree ever since. I feel ecstatic realizing the fact that I have been baking goodies whose names I hadn't remotely heard of in my life. We IT employees are always at the edge of a sword to fulfil work within deadlines. I have deadlines in Sweet Punch too. I need to post the recipes on 7th of each month... Well, these deadlines are much sweeter and dearer with a worthy end product we could relish. (At work, our customers relish our end product, nevertheless that too gives a different kind of satisfaction)


This time Divya placed a challenge of making Pear crumble. Since I couldn't manage to find pears I substituted with apples. I didnt know crumble would turn out. I blindly followed the recipe. I didnt know when to stop baking coz the recipe instructed to bake till 'golden and bubbling'. And my crumble was not bubbling uniformly. The adhoc bubbles left me puzzled whether I was to stop there or continue. I baked for 10 extra minutes than what the recipe called for and then stopped at the fear of a burnt crumble. The pics are not up to the mark. Like the saying goes 'Appearances are deceptive', the crisp crust and a 'oh-so' soft base of apples was a combo to die for. The presence of chocolates, almonds and lemon made it even more special. We all loved it even without vanilla ice-cream.
Ingredients:
1kg (4-5) ripe apples, peeled, cored and chopped into 1cm pieces
50g light brown soft sugar [ Can substitute with regular sugar]
Grated zest and juice of 1 unwaxed lemon
100g Swiss milk chocolate, roughly chopped
For the crumble:
100g plain flour [ You could substitute this with Whole wheat flour too]
50g butter, chilled and diced
50g light brown soft sugar
50g blanched almonds, lightly toasted in a dry pan and roughly chopped

Method
1. Preheat the oven to 180°C, gas mark 4. Grease 6 ovenproof teacups or ramekins or a pie-dish.
2. In a medium bowl, mix together the pears, brown sugar, lemon zest and juice, and half the chocolate.
3. Divide the mixture between the teacups or ramekins, spooning over any juice. 
4. To make the crumble, place the flour and butter in a medium bowl and, with your fingertips, rub together until the mixture resembles fine breadcrumbs. Stir in the sugar, almonds and remaining chocolate. 
5. Spoon the crumble over the pears and press down lightly. Place the crumbles on a baking tray and bake for 30-40 minutes until golden and bubbling.
6. Serve with a scoop of good vanilla ice-cream.
 

Best Blogger Tips

Shorshe Ilish - Hilsa fish in mustard sauce


Hilsa is an integral part of a Bong's existence. Wikipedia says "In many Hindu Bengali families two Hilsa fishes (Joda Ilish) are bought on special auspicious days, like some pujas. It is considered auspicious to buy two Hilsa fishes on the day of Saraswati Puja, which takes place in the beginning of Spring and also on the day of Lakshmi Puja which takes place in autumn."

Living in Bangalore, we only look at this fish through the glass pane in Fish Stall to please our Bong satiation. Do I hear people asking 'Why???' Answer to the 'Wh' question goes - 'Coz we don't think we are capable enough of digesting something as expensive as Rs.600-700 a kilo!’ Although once we put our digestive system to stake by giving in to buying Hilsa when the ‘Daily price chart read – Hilsa: Rs. 380’ Woohoo now I’m not claiming that 380 a kilo is cheap. But then we Indians are undisputed winners in bargaining. Idea of buying any trifle thing at a negligibly lower price makes us feel victorious. The men might disagree and say I’m trying to describe feminine nature under the label ‘Indians’. Okay, we women love the bargain game and admit it openly. But I personally feel that men secretly celebrate their triumphant bargains… What say?

Abbas had once brought home Padmar Ilish during Ma’s absence. He expressed his concerns (rather grave uncertainties) about how I was gonna cook something as exquisite as ‘Shorshe Ilish’. I was green with envy coz he so wanted ‘Maaaa…..’ to be there as I had never laid my hands on ‘Bangladesh’s National Fish’. It was a ‘Do or Die’ situation for the cook in me coz her reputation was at stake. A SOS call to Kakima (Bhabi’s Ma and my on-call help w.r.t any Bong dish) got me going. I was up early morning grinding mustard (a spice I always knew was used in nothing else but tempering my very own Rasams, Sambars and Chutneys) Oh! That too mustard that was white in colour was an enlightening fact. I made Shorshe Ilish and went to work. Abbas was supposed to have lunch and leave for office that day. I got an SMS from Abbas which read – “Darun hoyeche! Shorshe Ilish. I loved it. ________’ The blank line stands for the private lines we exchange, which I don’t think appropriate for all age groups. Lolz

Well guys, after trying several versions of this dish, I stick to the following tested version which wins me accolades from Abbas each time. (It is the easiest fish curry ever)

Ingredients:

Hilsa Fish - 5-6 pieces
Mustard paste - 1 tbsp
Salt - to taste
Turmeric powder - 1 tsp
Red chilli powder - 1 tsp
Mustard Oil - 2 tbsp (Mandatory)

For Mustard paste:
White mustard seeds - tbsp (soaked in water for 15 minutes)
Green chillies - 5-6
Salt - 1 tsp

Method:
1. Grind the ingredients called for Mustard paste with as less water as possible to get a fine paste. I make bulk of this paste and refrigerate for future use, coz less quantity of mustard seeds doesnt yield a fine paste. This paste can be stored for 15- 20 days.

2. In a pan, mix a tbsp of mustard paste, turmeric powder, red chilli powder, salt (carefully add salt coz mustard paste already has salt in it), mustard oil with a cup of water. Now place the fish pieces carefully in this mixture.

3. Cook on low flame covered with a lid for about 20 minutes or till you get a thick gravy. (Hilsa gets cooked in a jiffy.)

4. Remove the pan from flame and pour a tbsp of mustard oil on top and keep covered until served.
Best Blogger Tips

Tuesday, November 30, 2010

Paneer Butter Masala


It was one of those weekdays when I returned home with kids very well exhausted. I was entering our apartment gate balancing two bags dangling from both my arms, two high spirtited kids, both my palms clutching each of them to not let them run away. A familiar voice 'Soppui' sounded like music to my ears. It was our area's 'Mobile greens seller' calling out while pushing his cart laden with greens of all kinds. I'm crazy about greens and I instantly had the urge to buy and ended up with 2 big bunches of fenugreek / methi leaves. My two & a quarter year olds lent me their tinty little hands in picking the leaves. Now I'm not a kind of mother who'll spoil my kids by spoon feeding them. C'mon I have two of them and helping one's mother is one of the good habits kids must inculcate from childhood. (I'm glad my Amma never thought so! Phew!)

I made Methi Pulao which I could eat on its own. But I knew Abbas would come back from work and freak out at the sight of it. So I had to make some kind of a gravy to accompany it. Dunno what made me choose Paneer (which is another thing he doesn't like). Finally the hungry soul with rats, cats and dogs racing in his tummy came home and enthusiastically opened the the lids! The inquistive sarcastic looks made me wish I had Harry's Invisibility Cloak to hide myself. He held up all the anger and served himself, while both of us were dumbfounded. I tried to act as if I was too immersed in TV unaware of his dislikes. Finally he broke the ice saying "The curry has really turned out delicious or I wouldn't have had my dinner today!" I silently thanked my stars... and ofcourse Sailu for this restaurant style Paneer Butter Masala recipe.

Ingredients:
250 gms paneer Рcubed and saut̩ in a tbsp of ghee till golden brown, remove into a dish and add a cup of hot water to the fried paneer cubes and let them sit in it for 5mts,then drain the water and keep aside
2 big onions (blanch for 10 mts and puree)
1 tbsp ginger-garlic paste
1 tsp red chilli pwd (I used kashmiri chillis)
3 big ripe tomatoes (blanch ,de-skin and puree)
3 tbsps cashewnut paste
½ tsp coriander pwd
pinch of haldi (turmeric pwd)
1/2 tsp kasuri methi (dry fenugreek leaves)
garam masala pwd (make a pwd of 3 cloves,1 green cardamom and 1” cinnamon)
salt to taste
3 tbsps butter
2 tbsps fresh cream

Method:

1. Heat 2 tbsp of butter in a pan, add the onion paste and sauté till brown.
2. Add ginger-garlic paste. Saute for 3 minutes.
3. Add chilli pwd and combine,followed by the cashew paste and combine.
4. Add tomato puree, crushed kasuri methi,coriander pwd,haldi,garam masala and salt. Stir and let it simmer for 4-5 mts.
5. Add the paneer and simmer for 4-5 minutes. Add a small cup of water and let it cook on medium heat for 10 mts or till you get the desired curry consistency .Remove from fire, stir in remaining butter and fresh cream.
6. Let the curry sit for 10-15 mts before serving.Garnish with coriander leaves. Serve hot with rotis, naan , paranthas or simple steamed white rice.


Best Blogger Tips

Monday, November 29, 2010

Pani Puri


Going back in time:

During summer holidays, we would get hooked to watch all the TV serials that Annamma (granny) and Amma (mom) used to watch. There were two such Kannada serials called 'Maya Mruga' and 'Naaku Tanti' which were class apart from the normal 'Saas Bahu' or daily household 'Khitpit' saga. They were stories of 3-4 protagonists all different natured and from different walks of life. They used to be aired at 4:00 PM. Once the school re-opened, we would miss watching at the comfort of our house couches. While they were being aired, our school would have just dispersed and we would be walking our way back home. Luckily people who used to live on the streets that we walked were also the audiences of these serials. We would hault whenever we could sense that the serial was going on. We would sheepishly eavesdrop not to miss any dialogue. During break, we would again walk to stop at any hint of the second segment beginning. When the last segment would begin, we would have reached home.

Amma would make snacks for us for the 4 o' clock apetite to be quenched. One of those snacks would be Pani Puri. I don't know the exact recipe, but recreated some with instincts and memory. Picked recipes of Pani, Green and Tamarind chutney from Sailu's blog. The filling here is hot curried green peas with hot, sweet and sour chutneys, raw onions, sev. The filled puris are dipped in chilled tangy water and like Sailu says "Explosion of flavours" happens when you put it in your mouth. I specially like the combination of green peas and cold 'Pani'. Simply mind blowing.

My mom occasionally made puris at home but I never tried a hand at it. I conviniently buy my puris from supermarkets. I had all the chutneys left and wanted to make papdi chat. Couldn't find Papdis being sold in any super market here. Went to a chat stall and asked the Bhaiyya there. He gave a whole bunch of Papdis for 10 bucks! The woman in me was delighted! God bless him!

PS: I regret bad quality of photos. As we had savoured this in the late evening, the darkness has cause poor quality pics.

Pani Recipe

Ingredients:
6-7 cups cold water
1/2 cup packed pudina leaves
1 green chilli
Small piece ginger
1 tbsp amchur pwd
1/2 tsp chaat masala pwd
1/4 tsp cumin pwd
Pinch of black salt (optional)
Fresh coriander leaves for garnish
Salt to taste

Mehod:
1. Make a paste of mint leaves, green chilli and ginger and keep aside
2. Take a vessel, add the cold water in it, followed by the green mint paste and combine well.
3. Add cumin pwd, chaat masala pwd, amchur pwd, black salt, salt to taste. Garnish with coriander leaves. 4. Chill in refrigerator till use.

Green peas filling Recipe:


Ingredients:
Dry green peas - 1 cup (soaked overnight and boiled)
Tomatoes - 2 medium sized, finely chopped
Ginger paste - 1 tsp
Bay leaves - 2
Cumin seeds - 1 tsp
Red chillies - 1, beoken into 3-4 pieces
Oil - 1 tbsp
Salt - to taste
Sugar - 1 tsp
Red chilli powder - to taste
Turmeric powder - 1 tsp

Method:
1. Heat oil in a pan. Add cumins seeds, red chillies and bay leaves.
2. Once cumin seeds splutter, add ginger paste and saute till raw smell goes.
3. Add chopped tomtaoes and saute till they are well blended and oil oozes out.
4. Add green peas, turmeric powder, red chilli powder, salt, sugar and a little water and mix well together.
5. Cook till all the gracy has dried out and keep aside.

Khajur Imli ki (Sweet) Chutney Recipe
Ingredients:
3/4 cup grated jaggery (adjust)
10-12 dates
Small orange sized tamarind (de-seeded)
3/4 tsp chilli pwd
1/2 tsp saunf pwd (optional)
1 tsp roasted cumin pwd
Water as required
Salt to taste

Method:
1. Soak tamarind in 2 cups of warm water for 5 mts. Heat a heavy bottomed vessel, add the tamarind along with the water and bring to a boil. Turn off heat and cool.
2. Once cool, grind this tamarind mixture along with dates to a fine paste, adding very little water. Strain through a sieve and pour this tamarind-date paste back into the heavy bottomed vessel.
3. Cook on slow to medium flame for 2-3 mts. Add the grated jaggery and allow it to melt and blend well with the tamarind date mix. Continue to cook till it becomes a thick pouring consistency, approx 15-18 mts.
4. Add chilli pwd, cumin pwd, saunf pwd and salt to taste and combine. Turn off heat. Even if the chutney is thick, its fine.
5. Once cool, refrigerate and use as required.

Green (Hari) Chutney Recipe


Ingredients:
2 cups chopped fresh coriander leaves, packed
1 cup fresh pudina/mint leaves, packed
2-3 green chillis (adjust)
2 tbsps lemon juice
2 tbsps water
1 1/2 tsps sugar
Pinch of salt

Method:
1. Wash pudina and coriander leaves thoroughly and allow the water to drain.
2. Grind the pudina, mint leaves, salt, sugar, lemon juice and green chillis to a fine paste, by adding 2 tbsps water.
3. Remove into a bowl. Refrigerate until use. Goes well for chaats like Pani Puri, hot snacks like Samosa or as a spread for sandwich.

Red Chutney:


(This chutney has raw garlic and could be avoided while assembling coz many detest the flavour of raw garlic. But personally I am a garlic patron)

Ingredients:
Red chillies - 10 -15
Garlic - 5-6 pods
Cumin seeds - 2 tsp
Salt - to taste

Method:
1. Just grind all the ingredients with a little water.

Assembling:
Make a small hole at the top of a puri by lightly pressing. Take care not to break the puri. Place a tsp of hot green peas filling. Add 1 tsp of tamarind chutney, 2 drops of green and red chutneys each. Add a tsp of chopped onions and sev on top. Arrange filled puris on a plate in a circle. Place a small bowl of Pani in between and serve. Puris are be dipped in the bowl of Pani and directly stuffed into mouth without any delay.

Best Blogger Tips

Thursday, November 11, 2010

Dahi Vada


I was a very choosy and fussy eater in my childhood, rather till getting married. I remember my Ajja (Grandpa) would say 'Khanche mulle baisunu assaki tugele bammunu. Tukka poLoche aile tenna, tu khainattille itemache list kornu divka takka' (Meaning, wonder which corner of this world is your partner sitiing. when he comes to see you, I would hand him over a list of all that you don't eat.) I would say 'Ajja, haanv khavche itemache list kelleri sulabha.' (Grandpa, it would be better if you list all that I eat coz it would be a tad smaller list). I had a few favourite dishes of mine which I would determinedly stick to, unwilling to experiment.

We used to frequent an age old famous restaurant in Udupi called 'Diana'. I would always order 'Poori Kurma and Rose Milk' Now when I look back, I say to myself 'Wierdo!'. I would not have raw onions, tomatoes, coriander leaves even! Sighhhh... I would pick the minutest piece of tomatoes and coriander leaves from my curries and my banana leaf would end with a neat heap of all the 'wastage' at its right top. I used to not have curds. Hence only chat I could opt was masala puri with specific instructions to not garnish with raw onions or tomatoes or coriander leaves. Phewww! Wasn't it too much??

I would not eat Tomato Saaru which is one of my comfort foods now. I remember one of my aunts who was a great fan of my Amma's cooking would politely advise me - "Seema, you must try to taste all kinds of food. Your Amma makes the world's best Tomato Saaru. You are truly missing out on lot of good stuff". Now I crave for Amma's food which I don't have access to...

After marriage, my life dimensionally changed. All those food tantrums were put to an end, not at once but gradually. Nobody forced me to but somehow, absence of Amma and the way she would pamper me by cooking only what I ate. I was the one responsible to cook according to my family members' likes and dislikes. Also Bengali food is so magical that I could hardly say no to it inspite of the presence of ingredients I never laid hands on before. My parents and especially my sis, Sindhu would pester me to try out several things but in vain. If they see me now, they would be surpised.

This is one of the dishes I never tasted before marriage but people aound me were crazy about it.

Recipe source - Ria's Collection (Don't go by the length of the recipe, it very easy to make)

Ingredients:


For the vada/croquettes
Whole Urad / Black gram Dal - 1 cup
Water- 1/2 cup
Salt -to taste (about 1 1/2 tsp)
Green chillies- 6-7
Rice flour- 5-6 tsp
Oil- for deep frying

For soaking:
Warm water - 4 cup
Salt - to taste (optional)

For the dahi/Yogurt sauce:
Thick yogurt- 2 c
Water *- 1/2 c
Salt-to taste
Sugar- to taste

For garnishing:
Tamarind chutney- 4 tbsp (optional)
Red chilli powder/ Paprika- 1 tsp
Coriander powder-1 tsp
Cumin powder-1 tsp
Cilantro/Coriander leaves- 4 stalks, chopped fine.

For Tamarind Chutney: (optional)

Tamarind pulp - 2tbsp
Water- 2 cups
Salt- 1 tsp
Jaggery-1/2 cup, powdered & packed
Red chilli powder-1 tsp
Cumin seeds-1 tsp
Fennel seeds-1 tsp

How to prepare Tamarind Chutney:
1. Heat one cup of water in a microwave (or stovetop) and add the tamarind paste to it. Mix well making sure there are no lumps in it.
2. Add the other one cup of water and boil it.
3. Once it starts boiling, reduce the flame to medium and add the jaggery. Mix well and let it melt.
4. Let it boil till it reduces to half quantity.
5. Meanwhile, dry roast cumin seed and fennel seeds and powder them.
6. Once the chutney starts coating the back of a spoon, switch of the stove and add salt, red chilli poweder and powdered spices. Mix well.
7. Adjust the salt if needed.

Method:


For the vada/croquettes:
1. Wash the urad 3-4 times until the water is clear.
2. Soak the whole urad for 4-5 hours or overnight. In the morning, drain the excess water.
3. Grind it to a thick smooth paste along with 1/2 cup of water, salt and green chillies.
4. We need a real thick batter, thicker than cake batter. Basically it should be scoop-able and shape-able.
5. Add the rice flour to achieve that consistency. Rice flour also adds a crunch to the vadas when fried.
6. Heat oil on medium high for 3-4 minutes. Once it is hot, reduce the heat to medium.
7. Scoop out some batter using a spoon and drop it . Deep fry them till golden brown.Each batch will take 4-5 mins.
8. Drain the excess oil on a tissue paper.
9. Soak them in water +salt (add only if you need more salt for the vadas) for 2-3 mins and squeeze out the excess water.
10. Arrange them in a big serving bowl. Keep aside.

For the Yogurt sauce:
1. If your yogurt is thick, add water and whisk till smooth. Add salt & sugar to taste.
2. If your yogurt is loose, do not add excess water. Just add salt & sugar to taste.
3. Pour over the arranged vadas.

Garnishing:
1. Sprinkle red chilli powder, coriander powder and cumin powder over the dahi.
2. Drizzle few tablespoonfull of homemade tamarind chutney over it.
3. Garnish with coriander leaves.

Serve chilled!

Best Blogger Tips

Tuesday, November 9, 2010

Chhole - No Onion, No Garlic


Speaking of Chhole reminds me of the lady with whom I stayed as a Paying Guest. When I first joined the corporate world as a Fresher, I was sent on an 'On The Job training' to an all new place. It was just few months after my marriage and a great oppurtunity not worth missing. Due to the support of my in-laws and the ever-supportive and loving Abbas by my side, I was all set to take a leap into the corporate world. Living away from family was unknown to me till then. It changed my life 360 degrees. Financial independence and no guardian to be answerable to, taking your own decisions, it was an experience of its kind. We were a group of six gals living in the same PG. We would sing, dance, study, wash clothes, go out together. Our take home was in 4 digit figure then. We succumbed while paying aunty the rent which at times was more than half of our poor salary. But we had fun for the entire 4 and a half months. Needless to mention how I missed being with Abbas and family.

We used to get a glass of milk every night after dinner. We would wait with our normal sized glasses and the caretaker would appear with a huge jug of milk and the smallest glass ever made by mandkind. She would pour milk from the jug into that measuring glass (in front of our hungry eyes and sinking hearts) and then pour into our individual glasses. We would drink it blessing aunty! Chicken was served once a week, and you would not be able to spot the chiecken pieces even with a microscope. Chhole was the only thing worth its salt. It was served once a week and I would wait for it. One day I 'maskafied' the caretaker saying the Chhole was very delicious. She proudly said I made it today. I asked for the recipe. She said the normal "Onion+ginger+garlic+tomato+saute" recipe. Only thing that caught my attention in her recipe is that she made a paste of a handful of boiled chick peas and added it to the gravy which gave it an excellent texture. I have been following that ever since...
Back from memory lane...
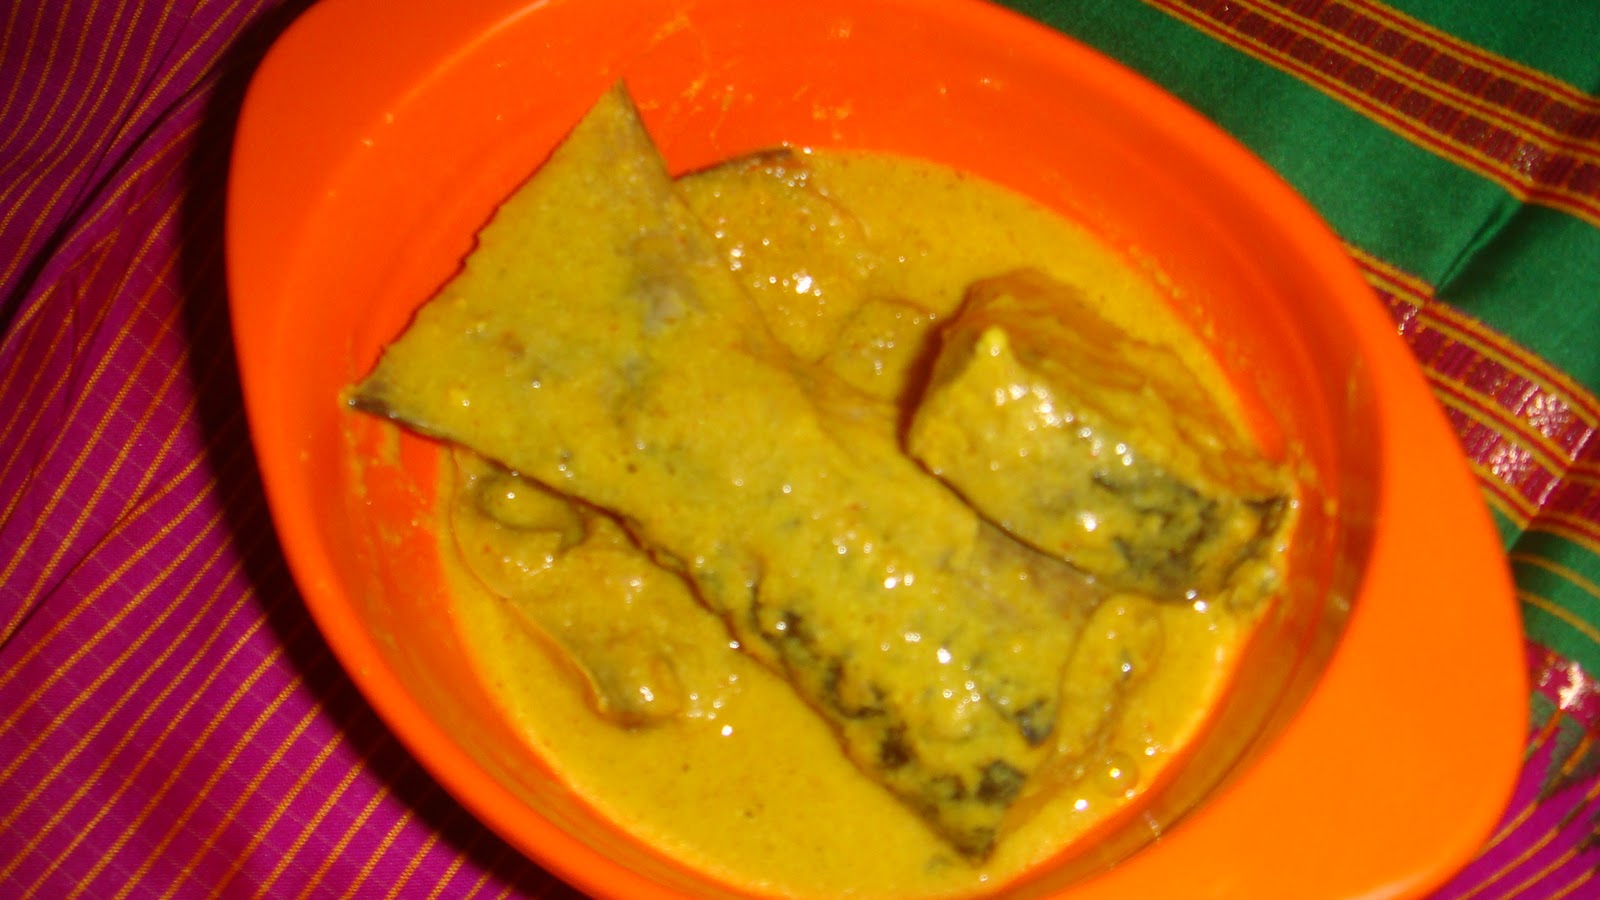
Puri or Luchi finds its place on our breakfast table on weekend mornings. It is generally accompanied by Chhole or Ghugni or Alur Tarkari. This is a Niramish Chhole meaning there is no onion or garlic used in this dish. Its my own recipe inspired by some Bong Niramish dishes and PG aunty's Chhole. Whenever I'm in no mood to chop onions, I go the Niramish way. If you taste the outcome, you wouldnt mind the absence of garlic or onion.

Ingredients:
Chickpeas - 1 cup
Potatoes - 1 medium sized, cut into small cubes (optional)
Tomatoes - 2 medium sized, finely chopped
Ginger paste - 1 tbsp
Cumin seeds - 1 tsp
Red chillies - 1 large broken into 3-4 pieces
Bay leaves - 1 or 2
Turmeric powder - 1 tsp
Red chilli powder - to taste
Coriander powder - 1 tsp
Cumin powder - 1 tsp
Salt to taste
Suagr - 1 tsp
Oil - 1 tbsp
Baking soda - a pinch

For garnishing:
Coriander leaves - handful, finely chopped
Lemon juice - 2 tsp
Chhole masala / Garam masla / Bong bhaja masala - 1/2 tsp

Method:
1. Soak chickpeas in 3-4 cups of water mixed with baking soda. Let it sit overnight.
2. Pressuer cook the chickpeas and potato cubes for 3 whistles. I generally keep the flame on high for the first two whistles and cook on low flame till the 3rd whistle goes.
3. Drain the water and keep aside. If you have lexcess of water, you may store it and may be use while making dough for Puri or Roti.
4. Take a handful of the boiled chickpeas and make a paste of it.
5.Heat oil in a pan. Add cumin seeds, red chillies and bay leaves.
6. Add ginger paste, you may lightly cover with a lid coz the oild would start spluttering making the surrounding a mess.
7. Add chopped tomatoes and saute till they are nicely smashed and oil starts oozing out from the sides.
8. Add the boiled chickpeas, potatoes, chickpea paste, turmeric powder, red chilli powder, coriander powder and cumin powder, salt, sugar and combine.
9. Add a cup of water and boil till you get the desired consistency. (Please note that the gravy thickens if it is allowed to stand and consumed at a lter time)
10. Remove from heat. Sprinkle chopped coriander leaves, lemon juice and any of the spice powder mentioned in the garnish section and combine.
11. Serve hot with puri or luchi or any Indian bread.


Best Blogger Tips

Monday, November 8, 2010

Chocolate Mousse


This was the October challenge on Sweet Punch and we were spoiled for choices as there was a Tomato Souffle and two varieties of Chocolate Mousse, one with eggs and the other without. The Eggless Chocolate Mousse was on my mind coz the prefix of recipe's name said 'Instant'. It had marsh mallows on the ingredient list which I somehow couldn't get hold of. At the eleventh hour, changed plans to make a Mousse with eggs. I had a bar of Cadbury's with I used. My kiddos simply loved it.


  • Chocolate Mousse (with eggs)
  • Recipe source: Simply Recipes 
  • INGREDIENTS

    • 4 1/2 ounces bittersweet chocolate, finely chopped

    • 2 tablespoons (1 ounce) unsalted butter, diced
    • 2 tablespoons espresso or very strong coffee (I used decaf espresso from a local Starbucks)
    • 1 cup cold heavy cream
    • 3 large eggs, separated
    • 1 tablespoon sugar
    (Optional) Raspberries and extra whipped cream

    METHOD

    1 Whip the cream to soft peaks, then refrigerate.
    2 Combine the chocolate, butter, and espresso in the top of a double boiler over hot, but not simmering, water, stirring frequently until smooth. Remove from the heat and let cool until the chocolate is just slightly warmer than body temperature. To test, dab some chocolate on your bottom lip. It should feel warm. If it is too cool, the mixture will seize when the other ingredients are added.
    3 Once the melted chocolate has cooled slightly, whip the egg whites in a medium bowl until they are foamy and beginning to hold a shape. Sprinkle in the sugar and beat until soft peaks form.
    4 When the chocolate has reached the proper temperature, stir in the yolks. Gently stir in about one-third of the whipped cream. Fold in half the whites just until incorporated, then fold in the remaining whites, and finally the remaining whipped cream.
    5 Spoon or pipe the mousse into a serving bowl or individual dishes. If you wish, layer in fresh raspberries and whipped cream. Refrigerate for at least 8 hours. (The mousse can be refrigerated for up to a day.)
    Serves 5-8, depending on the size of the servings.


Best Blogger Tips

Sunday, October 31, 2010

Methi Pulao


I don't have the luxury of making one pot meals coz Abbas completely detests them. Not that he demands elaborate meals, he is happy with Rice, Daal and Brinjal/Potato/Egg fried also. He likes his rice in its pure plain white form. I love my rice in just about any form. This is a kind of rice that I learnt from one of my aunts. The flavour of fenugreek leaves in the rice is simply mind boggling and I can have this one on its own. Well, it can be served with raitha or perhaps some onions rings and lemon wedges.

Ingredients:

Rice - 2 cups
Fenugreek leaves - 1 1/2 to 2 cups
Tomatoes - 2 medium sized
Turmeric powder - 1 tsp
Salt - to taste
Oil - 3 tbsp

Grind together:
Onions - 2 medium sized
Green chillies - 5 or to taste
Cumin seeds - 1 tsp
Ginger Garlic paste - 2 tbsp

Method:

1. Wash methi leaves and squeeze out the excess water from them, chop, keep aside.

2. Cook rice separately (salt has to be added in the process) and spread on large wide plates to let all the steam escape.

3. Heat oil in a pan, saute the ground onion paste till raw smell goes away.

4. Add tomatoes and saute till oil starts oozing from the edges.

5. Add methi leaves, turmeric powder and salt and saute for 3 minutes. Mix cooked and cooled rice gently with this mixture and methi pulao is ready to be served. Best Blogger Tips

Saturday, October 30, 2010

Begun Bhaja - Bong Brinjal Fry


Rice + Dal + This Dish = Happy + Content + Abbas (On the dinner table)

He is simply fond of Begun Bhaja. It is a 'no fancy', humble Bengali accompaniment on one's comfort platter. The turn off of this dish is that brinjal consumes a lot of oil. One tip that helps in reducing the oil absorption is to add a hint of sugar while marinating the brinjal slices. The best of Begun Bhajas can be made when the Brinjals take their own sweet time to get fried on the lowest of flames.

Ingredients:

Brinjal - 1 large, cut into thick slices
Red chilli powder - 1 tsp
Turmeric powder - 1 tsp
Sugar - 1/2 tsp
Salt - to taste
Oil - for shallow frying

Method:
Mix all the ingredients (except oil) such that all the Brinjal slices are coated with Masala. Heat oil in a pan and place 2-3 slices, depending on the size of the pan. Lower the heat and close with a lid. After 3-4 mins, turn the slices upside down and cover with lid again. Continue to cook till the brinjals are cooked completely. Increase the heat and remove the slices by slightly pressing them with a spatula to drain out excess oil.


Best Blogger Tips

Tuesday, October 26, 2010

Methi Murg


This is one of those dishes that has been lying in my drafts for ages. Dunno why it neever got posted. Now that I'm struggling hard to make appearances in the blogging world, this draft comes to my rescue. The recipe is from Sailu's blog. Whenever I wanna try a new variety of chicken dish, I turn to Sailu and her recipes never fail me. I had prepared this on Abbas' birthday this year and many more times then on. Every time I have got rave reviews coz it's unique flavour bowls over anyone who tastes it. Mindblowing combination of methi leaves and spices, best way to promote consumption of greens by adding them in a Chicken curry that people hardly deny eating. This recipe sure is a keeper.

Ingredients:
1 kg chicken, washed and cut into medium sized pieces
1 cup packed fresh methi leaves, add little salt+sugar+water, keep aside for 15 mts and squeeze out water
2 large onions, sliced, saute in a tbsp of oil till brown and cool
1 tsp green chilli paste (2-3 green chillis)
3/4 tbsp ginger garlic paste
1 tomato, pureed
1/4 cup yogurt
large pinch turmeric pwd
3/4 tsp red chilli pwd
1 tsp coriander pwd
1/2 tsp cumin pwd
garam masala pwd (2 cloves, 1″ cinnamon, 1 elaichi)
salt to taste
7-8 cashewnuts, soak in warm water and make paste
2 tbsps oil

Method:
1. Make a paste of browned onions and curd. Keep aside.
2. Heat 2 tsps oil in a cooking vessel, add the methi leaves and saute for 7-8 mts or till they turn crisp. Remove and keep aside.
3. Heat the remaining oil in the same vessel, add ginger garlic paste and green chilli paste and saute for 3-4 mts. Add turmeric pwd, red chilli pwd, cumin pwd and coriander pwd and combine.
4. Add the tomato puree and cook for 3 mts. Add the onion-curd paste and cook for another 3 mts.
5. Add the chicken pieces and combine well. Cook on medium high flame for 3-4 mts. Reduce flame, place lid and let the chicken cook till three fourth done.
6. Add the cashewnut paste, garam masala pwd and sauteed methi leaves and combine well. Add few tbsps of water if necessary at this point of time. Cook till the chicken turns soft and you get the gravy consistency of your choice. It should be a thick creamy gravy.
7. Turn off heat and serve hot with white rice, biryani, flavored rice or rotis. Best Blogger Tips

Tuesday, October 19, 2010

Eggless Chocolate Cake with Mocha Icing


This is one more from Divya's blog. I've been quite successfully baking for quite some time now and trying my hand at icing and cake decoration. I have never attended any cake decoration classes, learning a lot from my fellow bloggers. This was my first trial with chocolate icing and must say I never knew it was a breeze to make. I regret for not having tried my hand at it earlier. The best part is the cake is eggless, perfect for an occasion where you have vegetarian guests (So that you don't miss out on their compliments!). Do check my kids' pics where they licked off cake tin, while I was icing the cake.

Ingredients

Maida/Flour-1 cup
Milkmaid - 1/2 tin
Milk - 1/2 cup
Butter - 1/2 cup
Powdered sugar - 1 1/2 tbsp
Cocoa powder - 1/4 cup
Baking soda - 3/4 tsp
Baking powder - 3/4 tsp
Vanilla essence - 1 tsp

For the Mocha Glaze Icing

Cocoa powder - 4 tbsp
Softened butter - 4 tbsp
Coffee - 1 tsp
Icing sugar - 1 cup-sifted
Walnuts/Cashew/Badam - 2-3 tbsp,crushed

To Soak - 1/4 cup Coke

Method

For the Cake

1. Sift maida with cocoa powder,baking soda and baking powder-keep aside.
2. Mix sugar and butter,beat till fluffy.
3. Add milkmaid,beat well.
4. Add milk,vanilla essence and maida.
5. Beat well for 3-4 minutes till the mixture is smooth and light.
6. Transfer to a greased baking dish.
7. Microwave on 80% power for 8 minutes.
8. Let it cool.
9. Cut the cake into two and soak with coke( I did not cut the cake,just sprinkled coke all over the cake)

For the Icing

1. Microwave 4 tbsp water in a bowl for 1 minute.
2. Add coffee,
cocoa and butter to it and mix well.
3. Gradually add the sifted icing sugar,mix well.
4. Glaze the cake with the icing and garnish with crushed dry fruits.
5. Refrigerate till the icing is set.
6. Serve with ice-cream.


Also goes out to Versatile Vegetarian Kitchen's Bake-Off Event


Best Blogger Tips
Related Posts Plugin for WordPress, Blogger...