

The garlic pull apart rolls have been such a super duprt hit in the blogosphere lately. Most bloggers have tried this and it has received accolades from each one of them. My first attempt at these was a super duper flop. I cursed the yeast and was about to trash the whole packet. Exactly then I saw Srivalli beginning her Marathon with these rolls. I wanted to give it another try. If everybody could get it right, why couldn't I? I wanted to check if the fault was with me or the yeast??? Valli had mentioned a separate step of proofing the yeast to check if it is still active or not. I followed her recipe to the T except that I used half the quantity of all ingreients listed. My yeast was active but perhaps not as active as it is supposed to be (puzzled). It took about an hour and a half to increase in quantity. Well the outcome was worth the wait coz the rolls turned out warm and delicious, specially with the garlic, butter and coriander spread... These rolls along with a hot bowl of soup would make for a filling and comforting meal... I will try these with different filling next time...
Ingredients:
For the Dough All purpose flour / Maida - 3 cups
Warm Water- 1 cupYeast- 1 tbsp
Salt - 1 tsp
Sugar- 2 tbps
Extra Virgin Olive Oil- 3 tbps
For the Garlic Coriander Butter Spread
Butter- 50 grams
Garlic- 3- 4 grated
Coriander leaves, finely chopped - 2 tbsp
Salt to taste
Method
1. Bring butter to room temperature. Grate and pound the garlic well.
2. Finely chop the coriander.
3. Beat the butter well, mix everything together. Continue beating for couple of mins for thorough mix.
Proofing the Yeast:
In a bowl, take the yeast, add lurk warm water, sugar. Cover it and set it aside for 10 mins. Once done you will see a creamy foam formed on the top. This means the yeast is still active. If not please get another batch of yeast else your bread will never rise.
To make the dough
1. In a wide bowl, take the flour, add salt. Then add the yeast mixture and slowly add water to mix in. Knead till the flour forms a dough. At this stage it will be very sticky.
2. Add olive oil and knead well. Continue doing it till it forms a smooth dough. Punch it down couple of times. When you press the dough, it should spring back.
3. Grease a large bowl with olive oil. Apply the dough with oil by turning the dough in the bowl, cover the bowl with a damp muslin cloth or a cling film and let the dough double. (It took around 90 mins for my dough to double.) Remove the cover, punch the dough to remove the air from the dough and divide it into two.
4. On a well floured surface, roll out one ball into a rectangle about 1 cm thick.On the rolled out dough, spread the garlic spread (keep a little aside to smear on top) evenly over it and roll it into a log. Cut into small pieces.
5. In well greased baking tray, place the rolls cut side up and brush the top with some milk.
6. Keep the baking tray aside for about 20 minutes for the rolls to rise. Meantime, pre-heat the oven to 180 deg C.
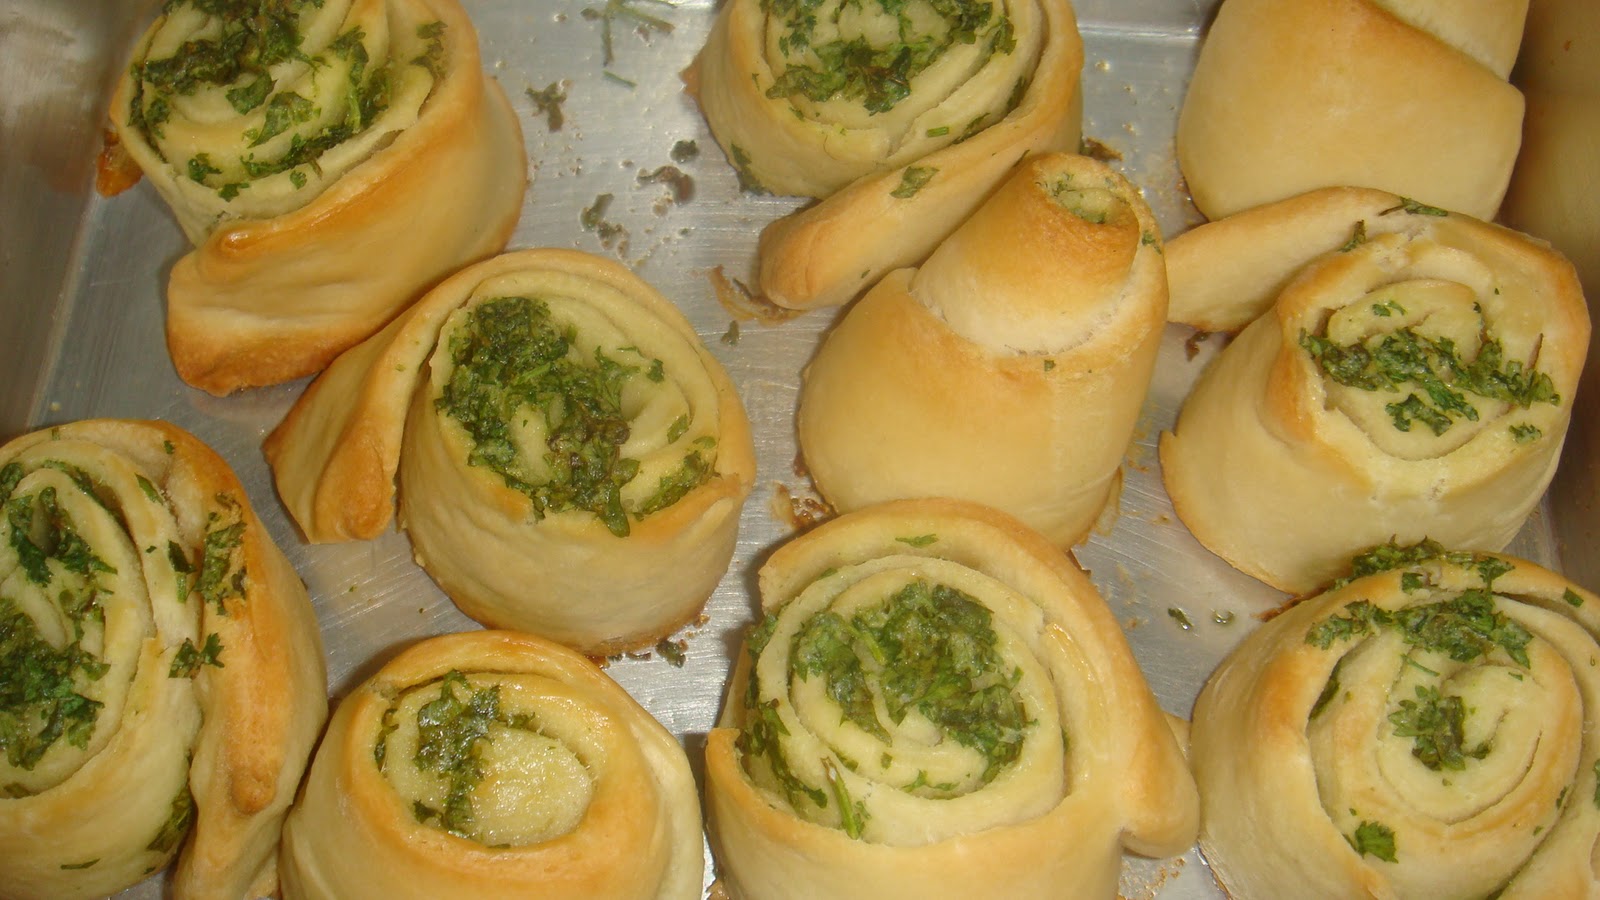
7. Bake for about 30 - 35 mins till the top of the rolls turns golden brown.
8. Once done, brush with a blob of butter over the top of the freshly baked rolls. This gives the rolls a lovely shine.


Am yet to try this garlic rolls, u guys are killing me with ur beautiful clicks..drooling drooling here..
ReplyDeleteI love how those harbs look out from the end, gives a nice flavor and rich color.
ReplyDelete